I have several more handmade cards to show you in the next couple of days but before I do that, I thought I’d share how I organize them. Organization is very important to me (which actually should be to everybody) because I have a small house and it can easily get overrun by my creations if I don’t keep them in check and find a place for everything I create. I use an ordinary, inexpensive, plastic cosmetic basket to store my handmade cards.
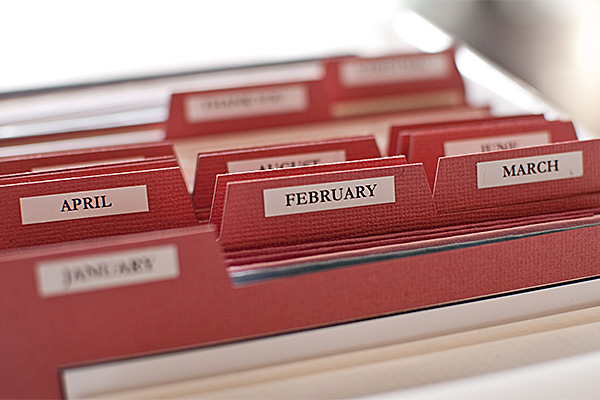
I used cardstock to make several labeled dividers to fit in the basket – one for each month of the year plus a few extras labeled “Birthday”, “Thank You”, “Christmas”, and “Miscellaneous”.
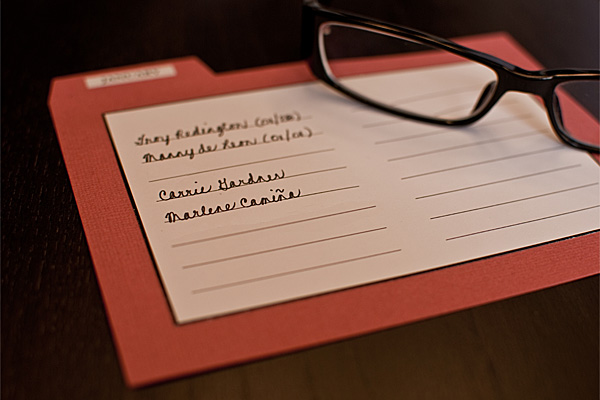
I provided a place to list down important dates like birthdays, anniversaries, and holidays on the dividers for each month of the year. I usually make several cards at a time and fill up each month with the number of cards I need to send out – this way, I’m not cramming to send out my greetings. Well, that’s the idea anyway. Like I mentioned here, I tend to get distracted once I’m able to enjoy the warm weather outside and before I know it, the month has passed without sending out my cards. {But I know I’ll get better at this in time.}
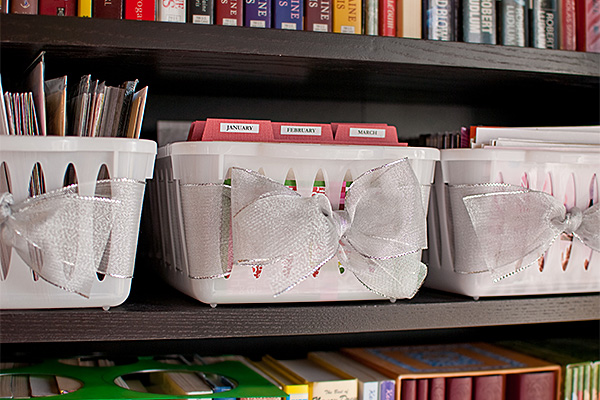
I store all my small cards (4.25 x 5.5) in the basket with the dividers and then I have another basket for larger cards (8.5 x 5.5) and odd-shaped ones. The plastic baskets are very generic so I spruced them up with a wide silver ribbon which I chose for its subtlety.

Aside from storing and organizing my cards, it’s also important that I have easy access to them – this encourages me to actually use them. That’s why I place the baskets on our bookshelf which makes them very accessible.
I’ve prepared a file you can print to make the dividers if you want to create a similar storage solution. You can download the file here.
| Con mucho amor, | |
 |