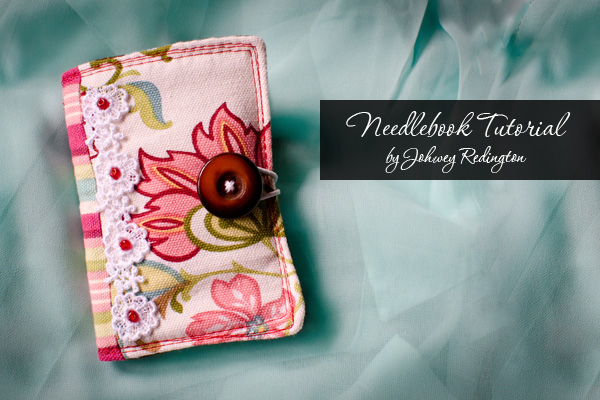
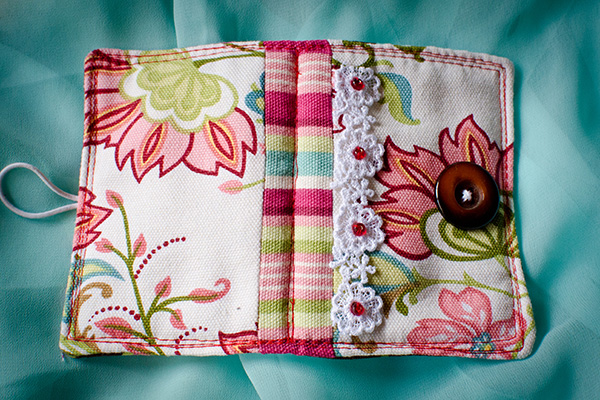
Here’s a needlebook project that you can easily make. It’s a wonderful gift idea – especially since Mother’s Day is fast approaching. I made one to store and organize all my needles but then I got smitten by how adorable it is so I decided to make a few more to give as gifts. The finished project measures 3-1/2″W x 4-1/2″L.
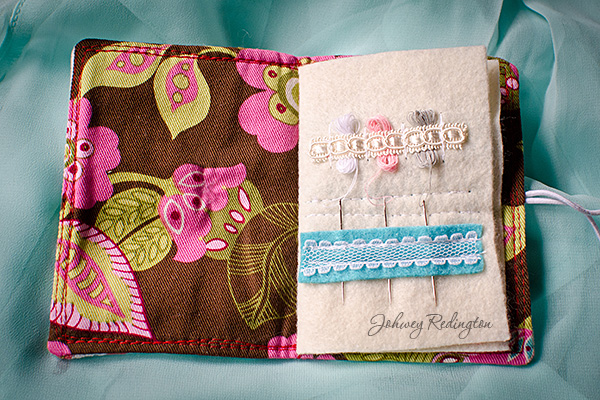
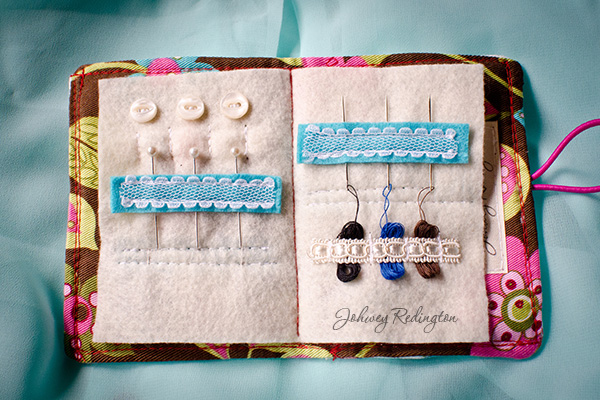
The pages of the needlebook are made with felt and each page is sewn with a strip of felt topped with a lace trim – for a decorative way to hold the needles. For those I made as gifts, I wanted to include threaded needles of various colors so I added narrow strips of ribbon/lace to hold the threads, like the one shown below.
You’ll need the following materials for this project:
- a sewing machine
- fabric* for front cover, 7″ x 5-1/4″
- fabric* for inside cover, 7″ x 5-1/4″
- batting material, 7″ x 5-1/4″
- felt for needlebook page, 6″ x 4-1/2″
- 4 strips of felt for holding needles, 1/2″ x 2-1/2″
- coordinating thread(s)
- large decorative button for enclosure, 3/4″ to 1″ wide
- hair elastic tie for enclosure
- 4 strips of 1/2″-wide lace, 2-1/2″ long
- 4 strips of 1/4″-wide lace, 2-1/2″ long
- pair of scissors
- large size crochet hook, see step 5
- laces, beads, appliques to decorate the cover (optional)
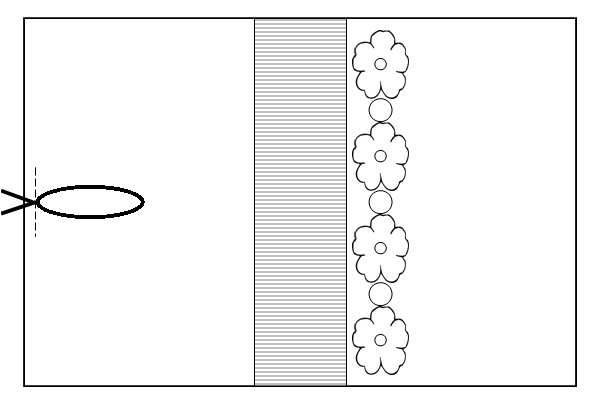
*This project is a great way to use up any scraps of fabric you may have. You can use 1 piece of fabric for each front and inside cover but if your fabric scraps are smaller than the required size, just stitch them together to create a beautiful patchwork cover for your needlebook. For my front cover, I used three pieces of fabric that I machine-stitched together, as shown below. And for the inside cover, I used 1 piece of coordinating fabric.
Step 1: Decorating the front cover.
If you’ve chosen a nice fabric design or have created a patchwork of fabrics for your cover, it’s really not necessary to add any more embellishments – especially if you want to keep it simple and since you’ll also be adding a large decorative button on the front. But if you really want to add more to the cover, like lace or applique, now is the time to do it – before sewing the front cover to the inside cover – so the back stitches won’t show. For my needlebook, I simply handstitched a lace trim to the front cover and added a few red beads for a nice accent.
Step 2: Putting the covers together.
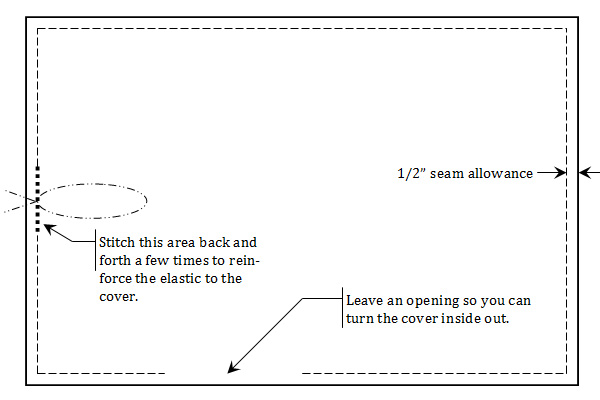
With the right side of the front cover fabric facing up, place the elastic tie on top as shown in the diagram below, with the loop facing inwards. Stitch the elastic tie to the front cover, 1/2″ from the edge.
Layer the materials for the cover in this manner: batting at the bottom, front cover fabric in the middle, and inside cover fabric on top – with the right sides of the front and inside covers facing each other. Sew along the edges with a 1/2″ seam allowance. Stitch the area where the elastic tie is positioned a few times back and forth to reinforce the elastic to the fabric. Leave an opening about 1-1/2″ wide.
Turn the cover inside out. Press (iron) and topstitch 1/4″ from the edges.
3. Preparing the needlebook pages.
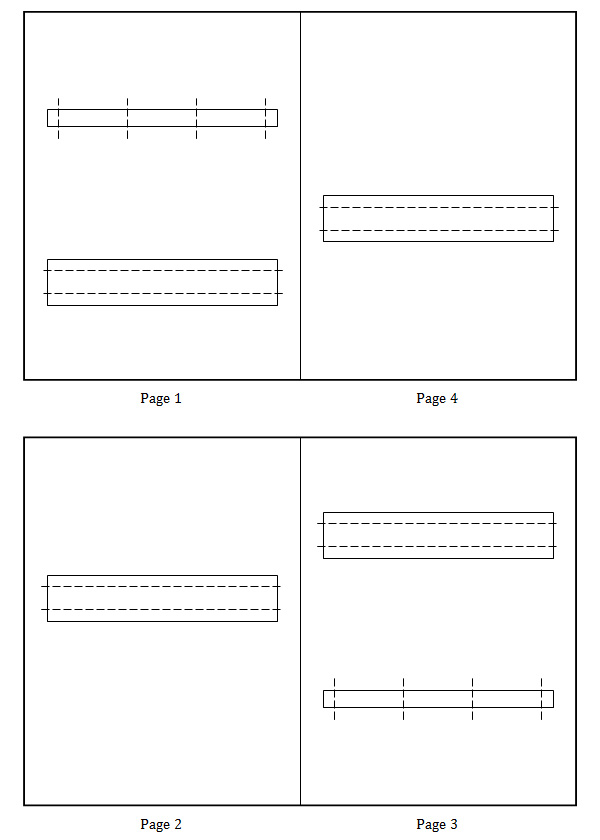
Fold the felt that’s to be used for the needlebook pages in half lengthwise. Mark the center, if you wish. Each page will be 3″ wide x 4-1/2″ long.
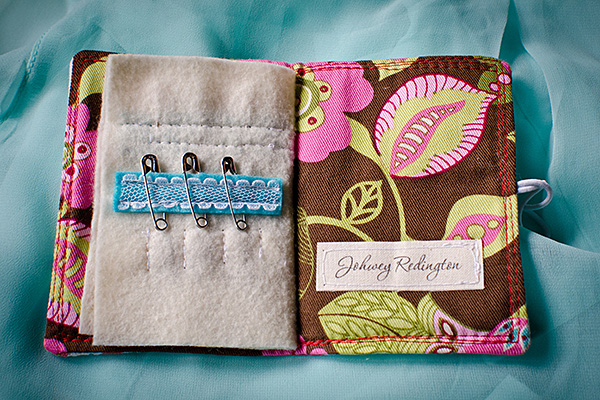
With the photos above and the diagrams below as your guide, sew the felt strips and lace trims on the pages. (Stitches are shown as dashed lines in the diagrams.) The vertical stitches are 1/2″ apart to hold the threads. The placement of the strips on the pages are arbitrary – so long as you stagger them so that when the needlebook is closed, it will not be too bulky.
4. Finishing your needlebook.
Place the felt page on top of the inside cover and sew a line on the middle to attach the felt to the cover.
Hand sew the large decorative button on the front cover, about an inch from the edge – adjust accordingly so that the elastic is not too tight and not too loose when the needlebook is closed.
5. Filling up the needlebook pages.
If you want to include threaded needles in your needlebook, here’s what you need to do: Thread 6 needles with different color threads (length of thread is up to you). With the 2 ends of the thread together, loosely loop the thread around your forefinger, then gently slip the looped thread from your finger. Use a large size crochet hook to help you insert the loop of thread in place, as shown below.


So far, I’ve been showing you the needlebook I made to give as a gift but for my purposes, I made my needlebook pages a little bit differently. I needed a place where I can keep my assortment of needles organized. I have a plethora: embroidery needles, beading needles, everyday use needles, bookmaking needles, repair needles, etc. – all different lengths, sizes, sharpness – well you get it. So I labeled some of my needlebook pages as shown below:

If you want to do something similar, simply print or stamp your label on a sheet of canvas or canvas paper.
And there you go – not too bad, right? I hope you try out this project – and if you do, let me know how it goes.
 |