Christmas Pop-up Card Workshop

Hello! Thank you for joining this self-study class. Email me with any questions or concerns and use the links below to navigate between lessons:

Download Files
Project #2 Template
![]()
Notecard Template
![]()
Project #2
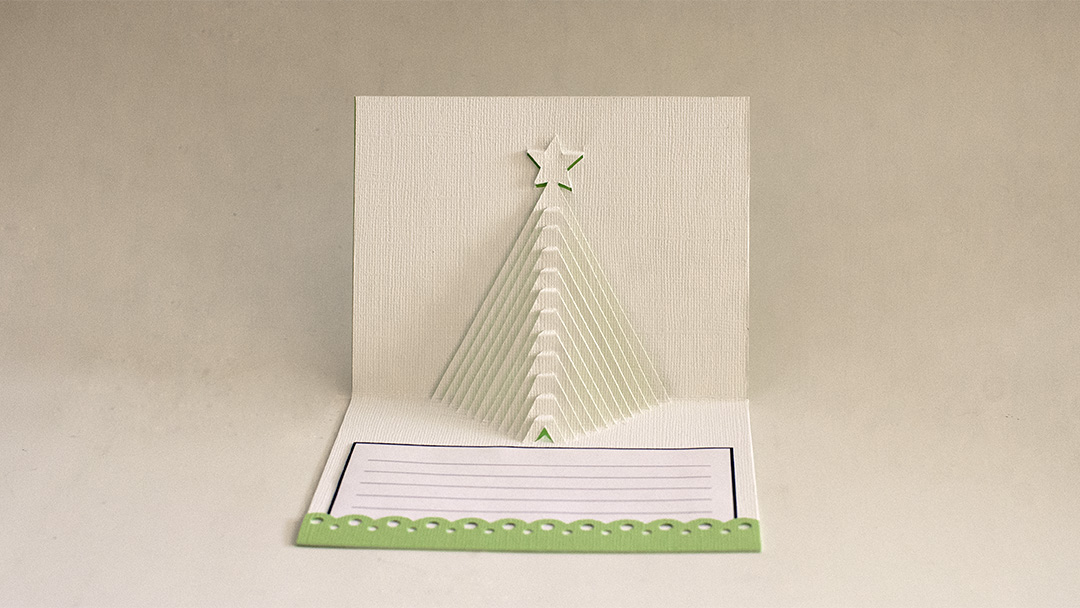
This Christmas card is actually a kirigami card – the difference being the design of a kirigami card is cut out of a single sheet of paper while the design of a pop-up card is made of several pieces that are glued or assembled together. This card is also what we call a 90° card, meaning that when the card is opened, the front of the card stands upright and the card will not open further than 90° without damaging the card. The finished card size is 5½” x 4¼”.
Materials You’ll Need
Paper Requirements:
- 1 sheet of 8½” x 11″ white cardstock paper, the pattern for the card will be printed on this sheet
- 1 sheet of 8½” x 5½” colored cardstock paper for the base card, folded in half crosswise to make a 5½” x 4¼” card (an 8½” x 11″ sheet of paper will yield 2 base cards)
- finished envelope or 8½” x 8½” decorative paper to make an envelope
Optional Materials:
- decorative edge punch
- 1″ strip of cardstock paper, at least 5½” long and the same kind of paper as the base card
- copy paper to print the notecards on
Project Pattern
Download the pattern and print it on the back side of the paper so that the printed lines are not visible when you assemble the card.

If you want to use the same notecard I use, you can download them here. To cut out the notecards, just align your steel ruler with the tick marks on the sides and cut with a craft or utility knife.
Complementing Your Card with an Envelope
This pop-up card is a standard A2 size and it’s fairly easy to find and buy high-quality envelopes for this card size. But if you’re feeling creative all the way, you’ll find a video demonstration on how to make an envelope in Project #3. Just use 8½” x 8½” decorative paper instead of the 12″ x 12″ paper.