Christmas Pop-up Card Workshop

Hello! Thank you for joining this self-study class. Email me with any questions or concerns and use the links below to navigate between lessons:

Download Files
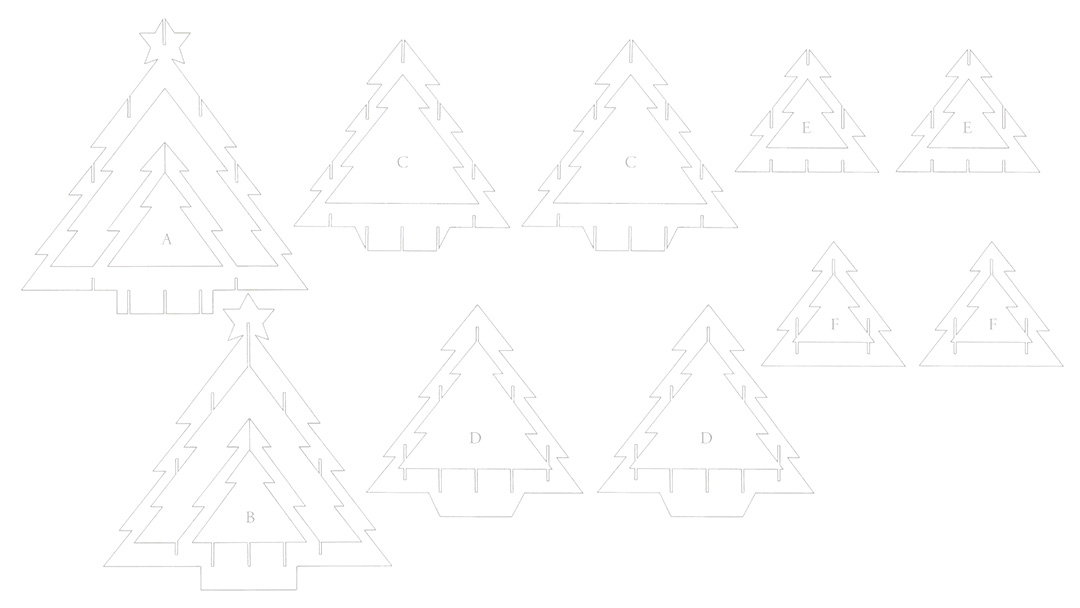
Project #3 Template
![]()
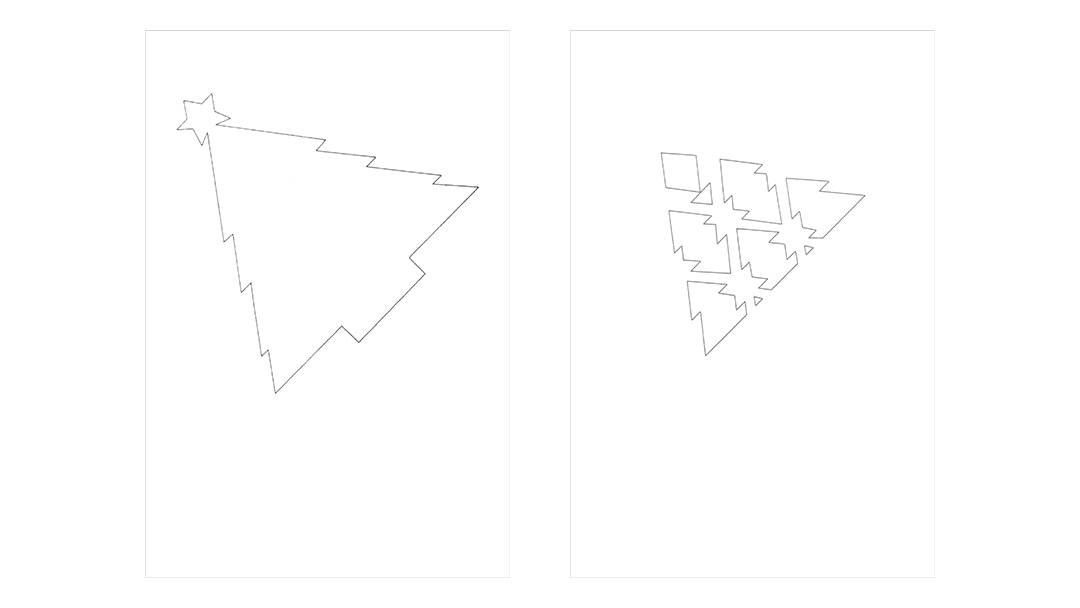
Basecard Template
![]()
Project #3
Like the first pop-up card, this is a 180° card – it opens to a flat angle to reveal the design inside. At 6″ x 9″, it is the largest card in the workshop. The pop-up tree is a completely separate piece and is attached to the card with a thread.

Materials You’ll Need
Paper Requirements:
- 2 sheets of 8½” x 11″ cardstock paper for the pop-up tree, the pop-up tree pattern will be printed on these sheets
- 2 sheets of 6″ x 9″ white or light-colored cardstock paper for the inner card, the tree outline base pattern will be printed on one of these sheets
- 1 sheet of 6″ x 9″ dark-colored cardstock paper, the other base pattern will be printed on this sheet
- 1 sheet of 12″ x 9″ cardstock paper for the base card, folded in half crosswise to make a 6″ x 9″ card
- 1 sheet of 12″ x 12″ decorative paper for the envelope
Additional Materials You’ll Need:
- paper piercer
- piercing mat or old mouse pad
- needle and white thread
- adhesive tape
Project Patterns
Download the pop-up tree pattern and print it on the back side of the papers.
Download the base pattern for the inner card. Print the left pattern (the tree outline) on white or light-colored cardstock and the right pattern on a darker-colored cardstock. Remember to print on the back side of the paper so that the printed lines are not visible when you assemble the card.
Lesson Videos
Handmade Envelope
Refer to the diagram below if you decide to create a template for your envelope.
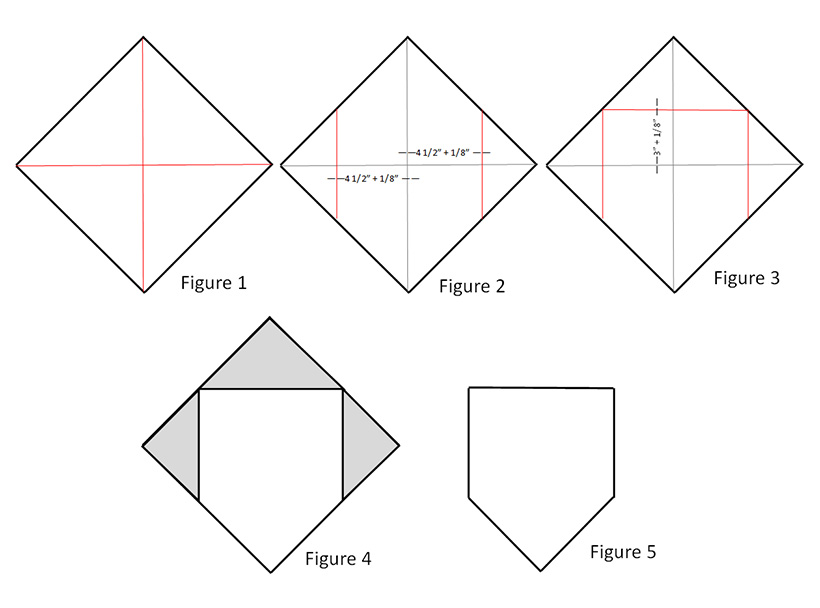
Using your pencil, mark your 12″ x 12″ chipboard or cardstock paper as shown in Figures 1, 2, and 3. (Red lines represent the pencil marks.) Cut away the shaded parts as shown in Figure 4. Your template should look like Figure 5.